Showing posts with label Budget-friendly. Show all posts

Monday, April 27, 2015

Chicken and Zucchini

This is another Whole30 favorite. It's super simple, but super delicious. 

Chicken and Zucchini

3-4 tbs olive oil
1 lb chicken (breasts, thighs, or tenders) cut into bite sized pieces
1/2 onion, sliced
2 medium zucchini, cut into circles or half-moons
salt
pepper
cayenne pepper (optional)

Heat 2 tbs olive oil in a large skillet over medium heat. Add onion, salt and pepper. When onion starts to soften, but not brown, add chicken. Sprinkle with salt and pepper. Cook, stirring occasionally, until chicken just starts to brown. Add zucchini, more oil, if neccessary, and season with salt, pepper, and cayenne, if using. Cook until chicken and zucchini are nicely browned and chicken is cooked through, about 5 minutes. 

Tuesday, July 09, 2013

Black Bean Sliders

One of the areas I mentioned that we are working on discipline is with our grocery budget. Budget has kind of always been a four letter word in our house, but these days, frugality is a must. So in an effort to make one of the kid's favorite meals stretch even more, I added black beans to our sliders. (It goes without saying that I made my kids regular sliders, right? Come on. This is the closest my son will ever come to actually eating beans.)
I think my husband was more than a tad wary of them, but he tried them anyway. We both agreed they could use some help texturally. They were very soft. I cooked them on the griddle, so they were nicely caramelized, but still soft from the beans inside. (The original recipe calls for a crunchy coleslaw on top- good idea.) Some guacamole on top would have been delicious, and some lettuce would have added some crunch. As it was, I tossed a couple of chips on there and gobbled them up. They weren't bad, but they weren't as good as they could be. Maybe next time...they sure did stretch that meal. 
Black Bean Sliders
adapted from Melissa d'Arabian

1/4 cup cooked black beans
2 tablespoons olive oil
1 teaspoon garlic powder
Kosher salt and freshly ground black pepper
1/2 pound ground beef
mini hamburger buns

Preheat the grill, griddle, or a skillet. In a medium bowl, mash the black beans, 1 tablespoon olive oil, and garlic powder with a potato masher or fork until very creamy. Gently mix the black bean mixture with the ground beef. Season the mixture liberally with salt and pepper. Divide the mixture into 8 equally portioned thin patties. Lightly brush the grill or griddle with the oil (or add the remaining tablespoon to your skillet) and place the burgers on the hot grill. Cook the burgers until a golden crust is formed, about 1 to 2 minutes per side. Serve the sliders on mini hamburger buns.

Friday, March 22, 2013

Roasted Sausages and Vegetables

AKA- The night that Facebook saved dinner.

I bought some Italian sausage because it was on sale and I had a coupon which doubled. Cheap dinner is always a good idea. I usually use it to jazz up our standard cheese pizza, but I didn't want to walk back over to the opposite side of the grocery store to get mozzarella cheese. So last night, the sausage was staring me in the face, taunting my nearly empty fridge and cabinets. I turned to my friends on Facebook for inspiration. What we hit on was, in a word, success. An easy, delicious, success. You can basically throw whatever you have in here and it will probably taste pretty darn good.


Roasted Sausages and Vegetables

1 package Italian sausage links, cut into bite-sized pieces
1 russet potato, scrubbed but not peeled, cut into bite-sized pieces
2 large carrots, peeled, cut into bite-sized pieces
2 cloves garlic, roughly chopped
olive oil
salt and pepper to taste
fresh rosemary or thyme, if you have any- I had rosemary

Preheat oven to 400. In a baking dish or on a large baking sheet, toss together the vegetables with a couple of tablespoons of olive oil and salt and pepper to taste. Place the sausage pieces on top, along with 3 sprigs of rosemary (I didn't even strip the leaves off the stems- just threw the whole thing in there!). Roast for 30 minutes, stirring everything about half way through the cooking time, until the sausage is cooked through, the veggies are softened and starting to caramelize beautifully.
Serve with Easy French Bread.


Friday, February 15, 2013

Nacho Spuds

I can't believe I haven't shared this recipe already. I've been making it for years and it's a firm family favorite. 
I also can't believe that, for the second year in a row, I succumbed to serving heart-shaped food for dinner on Valentine's Day.

Nacho Spuds
from Rachel Ray

2 large baking potatoes (1-1/2 pounds total), sliced into 1/2-inch-thick rounds
2 1/2 tablespoons extra-virgin olive oil
Salt and pepper
1/2 pound lean ground beef sirloin (Omit this and you have a really tasty vegetarian dinner.)
1 15 ounce can black beans, rinsed
2 tablespoons taco seasoning (I make my own- chili powder, cumin, oregano, onion powder, garlic powder)
1 8 ounce package shredded sharp cheddar cheese (2 cups)
1 cup grape tomatoes, quartered lengthwise
Sour cream and shredded lettuce, for serving


Position a rack in the upper third of the oven and preheat to 450 degrees . On a rimmed baking sheet, toss the potatoes with 2 tablespoons olive oil; season with salt and pepper. Arrange in a single layer and bake until golden, about 20 minutes.
Meanwhile, heat a heavy skillet over medium-high heat. Add the remaining 1/2 tablespoon olive oil and the ground beef and cook, breaking up the meat with a wooden spoon, until browned, 2 to 3 minutes. Mix in the beans, taco seasoning and 2 tablespoons water. Lower the heat and simmer, stirring, until heated through, about 10 minutes.  (Because of my picky eaters, I don't add the beans to the meat mixture. I just top half the potatoes with meat and half with meat and beans.)
Transfer the potatoes to an ovenproof platter. Sprinkle half of the cheddar on top, spoon on the meat mixture, then top with the tomatoes and remaining cheddar. Place in the oven and turn off the heat. Let stand until the cheese is melted, 2 to 3 minutes. Serve with the sour cream and lettuce.

Monday, January 14, 2013

Homemade Flour Tortillas

I get pretty excited when I discover something that I can make from scratch instead of buying premade. However, so often the excitement is short-lived because the time required is too great to justify it. Case(s) in point- homemade noodles, homemade sandwich bread.  Maybe some day. Not right now. 
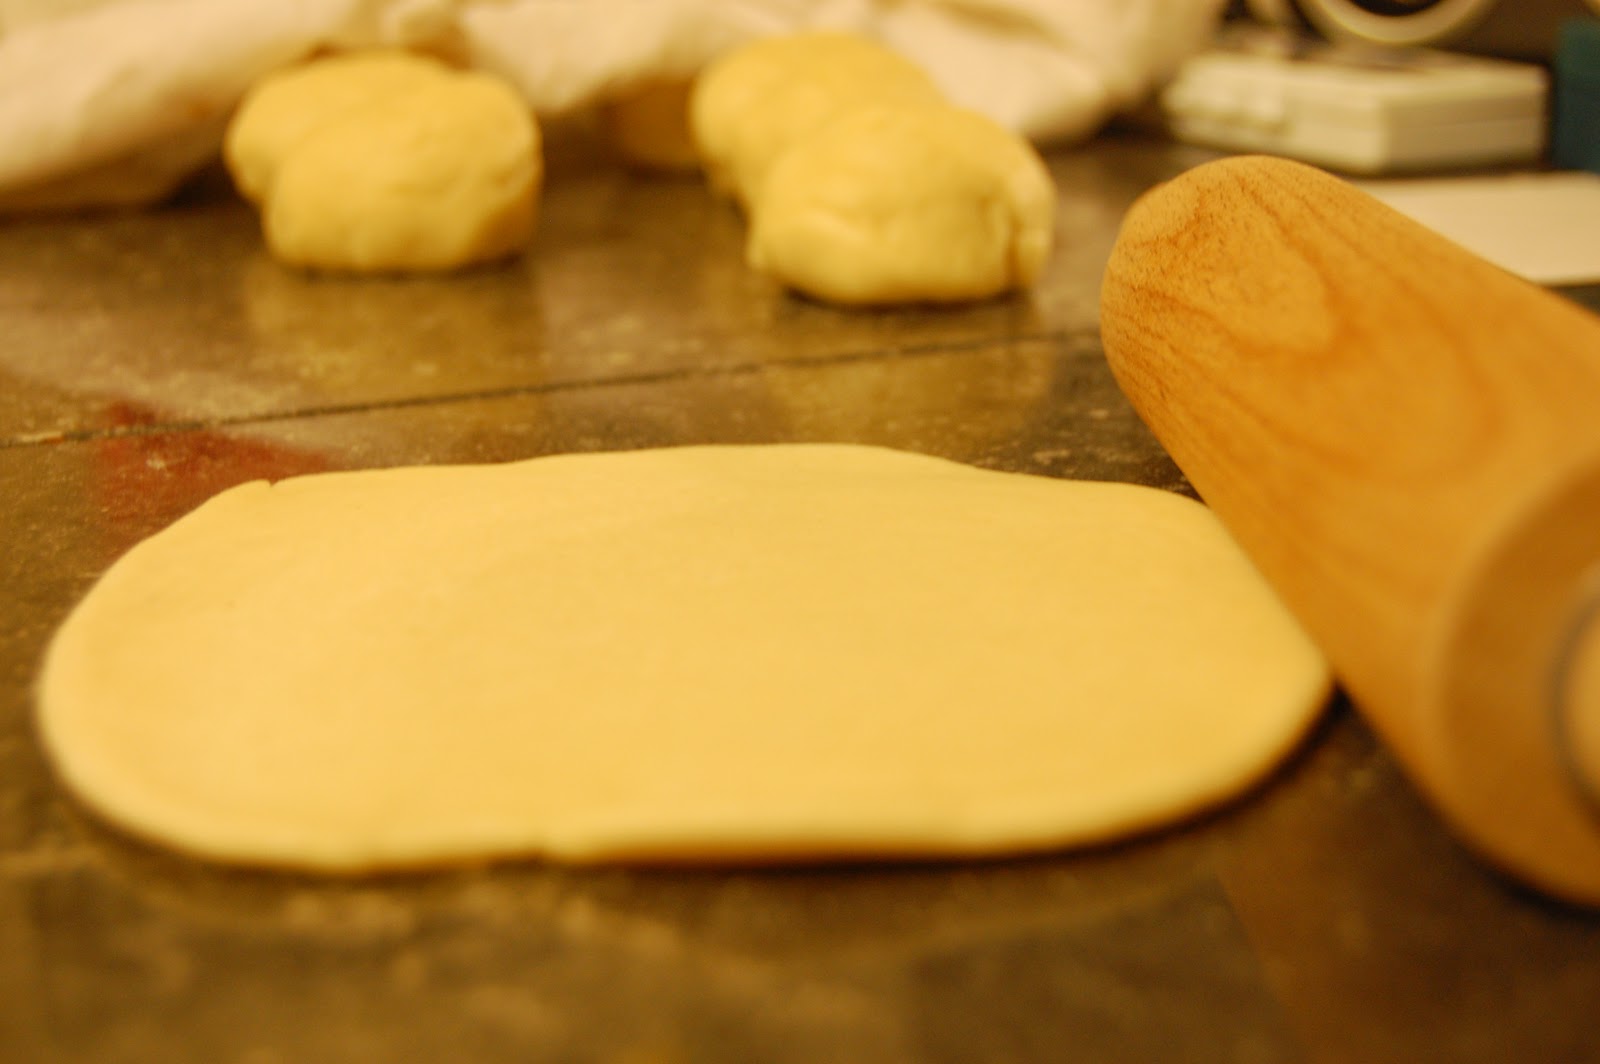
However, these flour tortillas are super simple and super delicious. So much so that I find it very hard to justify buying a package of them- complete with 12 or 15 ingredients.  The secret is to roll them out as thinly as you possibly can. And I have the best results when I use a large nonstick skillet. 

Homemade Flour Tortillas
from Joy of Cooking

2 cups bread flour
1 tsp baking powder
1 tsp salt
1/4 cup vegetable shortening or lard
3/4 cup hot (115-130 degrees) water- I just let the tap get as hot as it can.

Combine all ingredients in a large bowl or the bowl of a heavy-duty stand mixer. Mix by hand or on low speed until the dough comes together. Knead by hand or with the dough hook on low to medium speed until smooth, 4-6 minutes.
Divide the dough into 8 pieces and roll them into balls. Cover and let rest for 20 minutes.
Roll out each ball of dough into a 6-8 inch round about 1/8 inch thick. If the dough is resistant, move to the next piece and return later to finish rolling.
Heat a large cast-iron or nonstick skillet over medium heat. Slide the tortillas into the skillet one by one, cooking until brown spots appear, about 30 seconds on the first side, 15 seconds once flipped. Cover the cooked tortillas to keep warm while you cook the rest. Serve warm.
Picky-Eater Approved

Wednesday, July 25, 2012

Granola

Besides the great friendships I formed, my favorite thing about the college I attended my freshman and sophomore years was the cafeteria.  My BFF and I love food, and we never complained about the options available.  It was in college that I learned to love granola, though never as a breakfast cereal.  It was often dessert.  I would melt chocolate chips and peanut butter in the microwave and then toss it with granola.  Alongside a big glass of milk, I was in heaven.  
These days, granola is a staple in my house.  I eat it for breakfast (dry), washed down with my coffee.  I use it to make granola bars.  I toss in some chocolate chips and eat it for a late night snack, glass of milk on the side.  You can use any nuts you like, leave them out, chop them up.  Sometimes I toss in raisins, but not often.  The cinnamon and ginger add great flavor and just the tiniest hint of spiciness.  
Granola
adapted from Molly Wizenberg

3 cups old-fashioned oats
1 cup almonds
1-3 tablespoons raw sugar (or brown sugar)
3/4 teaspoon ground cinnamon
1/2 teaspoon ground ginger
1/4 teaspoon (generous) salt
1/3 cup honey
2 tablespoons vegetable oil


Preheat oven to 300°F. Line rimmed baking sheet with parchment. Mix first 6 ingredients in large bowl. Place honey and oil in a microwave safe dish and heat until smooth, about 45 seconds. Pour honey mixture over oat mixture; toss. Spread on prepared sheet. Bake until golden, stirring every 10 minutes, about 35-40 minutes. Place sheet on rack. Stir granola; cool. Store airtight for up to one week.

Wednesday, July 11, 2012

Honey Cornbread Muffins

I'm an Okie, so I eat a lot of cornbread.  I grew up eating my Grannie's cornbread, made in a cast-iron skillet.  I still love it to this day, but these beauties are the favorites in my house.  My husband loves the crunchy exterior that the muffin pan lends, I love the sweetness of the honey.  I make them a lot in the winter to eat with stew, but they're also perfect with my favorite budget-saving meal (and another childhood favorite), beans and cornbread.  
Honey Cornbread Muffins
from Real Simple Magazine

4 tablespoons unsalted butter (1/2 stick), melted, plus more for the pan
1 1/4 cups all-purpose flour, spooned and leveled
3/4 cup cornmeal
1 1/2 teaspoons baking powder
1 teaspoon kosher salt
1/2 teaspoon baking soda
2 large eggs
1 cup buttermilk
1/3 cup honey

Heat oven to 375° F. Butter a 12-cup muffin tin.
In a medium bowl, whisk together the flour, cornmeal, baking powder, salt, and baking soda.
In a large bowl, whisk together the eggs, buttermilk, honey, and melted butter. Add the flour mixture and stir to combine.
Divide the batter among muffin cups and bake until golden brown and a toothpick inserted into the center of a muffin comes out clean, 20 to 30 minutes (mine take about 20-23).

Monday, July 09, 2012

Gwyneth Paltrow's Fried Zucchini Spaghetti

When your mother-in-law gives you the largest zucchini you've ever laid eyes on, use some for zucchini pancakes, some for chocolate zucchini bread (a recipe I thought I had shared but apparently have not! Soon!), and some for Gwyneth's fried zucchini spaghetti. Smile to yourself as you eat a huge bowl of it, knowing you don't have to share it with any of the picky eaters in your house.

Fried Zucchini Spaghetti
from My Father's Daughter, by Gwyneth Paltrow

1 pound small zucchini, very thinly sliced crosswise
1/4 cup all-purpose flour
Salt
1/2 cup plus 2 tablespoons extra-virgin olive oil
3/4 pound spaghetti
1 cup shredded Parmigiano-Reggiano cheese, plus more for serving
1/2 cup torn basil leaves
Freshly ground pepper
Lemon wedges, for serving

In a medium bowl, toss the zucchini with the flour and a pinch of salt. In a very large skillet, heat half of the oil until shimmering. Add half of the zucchini and fry over high heat, turning once or twice, until browned and crisp, 3 to 4 minutes. Using a slotted spoon, transfer the zucchini to a paper towel–lined wire rack and season with salt. Repeat with the remaining oil and zucchini.

Meanwhile, cook the spaghetti in a large pot of boiling salted water until al dente. Drain, reserving 1/2 cup of the pasta cooking liquid. Return the pasta to the pot and toss with the 1 cup of cheese, the basil and a generous pinch of pepper. Add the reserved pasta water a little at a time, tossing well to coat. Transfer the pasta to a bowl and top with the crispy zucchini. Serve right away with lemon wedges and additional cheese.

Sunday, July 08, 2012

Homemade Dried Breadcrumbs

I've finally stopped eating the heels of the loaves of our bread.  I realized that "sacrificing" in this way was really pointless and I could partake of the regular bread for my morning toast.  But I always hesitated to throw them away.   Surely I'll make breadcrumbs...someday?  That hesitation became utter motivation one day when my "ingenious" boys tried to use the entire loaf of bread as a step stool in order to reach the peanut butter.  They succeeded in ruining an entire loaf of bread.  That loaf went into the freezer and, today, became dried breadcrumbs.  (And eventually, our chicken nuggets.)


Homemade Dried Breadcrumbs
Preheat oven to 275.  
Start by tearing your bread (heels, inside pieces, whatever you have- crust and all!) into pieces and placing them into a food processor.  I only have a mini-chopper, so I have to do this in batches.  Pulse until you have fine crumbs.  Spread your breadcrumbs into a single layer onto a baking sheet lined with parchment paper or a silicone mat.  
Bake breadcrumbs for 30-45 minutes, turning the crumbs every 10 minutes, until they are dried out and lightly golden.  Your time will vary depending on how much bread you use.  My 3/4 of a loaf of bread took a full 45 minutes, at which point I turned off the oven but left the pan of crumbs in there to finish drying out while I put kiddos down for naps.  
Place your breadcrumbs in a ziploc and bag and freeze it!  Pull them out whenever you need breadcrumbs for your favorite chicken nuggets or weeknight chicken dish.  

Friday, June 29, 2012

Homemade Croutons

Whenever my homemade bread sits on the counter long enough that it only appeals to me, I make croutons.  Whenever I buy a baguette or french bread and we don't eat it all in one sitting, I make croutons.  Whenever I have bread that is going south, I make croutons.  I can freeze the bread until I'm ready to make croutons as well.  They're perfect for salads (of course) and, as I showed you yesterday, my boys love them for snacks.
Stop throwing away your bread!  Make croutons!

Homemade Croutons

bread, cut into cubes
about 2 tbs olive oil, depending on how much bread you have
salt to taste
any other seasoning you want (use garlic powder, italian seasoning, etc.)

Preheat oven to 350.  On a cookie sheet, toss bread cubes with oil, season with salt.  Toss to evenly coat.  Bake for 15-20 mins, turning cubes/shaking the pan occasionally, until golden brown all over.  Let cool and enjoy!  Can be stored in a baggie at room temperature.
Play around with these- you could top them with grated parmesan cheese when they come out of the oven, you could make them sweet by coating them with cinnamon and sugar before you bake them.  Yum!

Tuesday, June 26, 2012

Black Bean Quesadillas

When I make a big batch of black beans in my slow-cooker, I end up with bags and bags of them in my freezer.  They are extremely useful for quick lunches, such as this one.  This recipe is actually for a black bean dip, which is incredibly delicious and dangerous, if you happen to find yourself with a bag of Frito's around...
Black Bean Quesadilla
Bean Dip recipe by Tyler Florence

2 (15 oz) cans black beans, drained and rinsed
3-4 slices bacon (Omit this for a delicious vegetarian meal)
1/2 of a medium red onion, chopped
1 jalapeno (or more to taste), seeded and chopped
1/2 cup chopped cilantro (I omitted this, as my husband is in the cilantro-haters camp)
1 tsp ground cumin
salt
1/2 cup of your favorite salsa (I had none, and this recipe was still delicious)
Corn tortillas
Grated cheddar cheese (or monterey jack, pepper jack, mexican blend, etc.)


Place the black beans in a food processor and puree until smooth.  Set aside.

In a medium skillet, cook the bacon until crisp, 5 or 6 minutes. Transfer to a paper towel lined plate to drain, leaving the fat in the pan.  Add the onion and jalapeno, cook until the onions are translucent, 3-4 mins.  Add the cilantro and cumin and cook for 1-2 mins longer.  Add the pureed black beans, salt to taste, and salsa, crumble in the cooled bacon, and stir to combine.

Preheat oven to 350.  Place corn tortillas on a greased baking sheet.  Spread with 3 tbs of the black bean dip on one tortilla.  Top with 1-2 tbs grated cheese.  Top with another corn tortilla.  Bake until cheese is melted and beans are heated through, 7-10 mins.  (You can certainly cook this in a skillet, like you would a grilled cheese.)  Cut into triangles and serve with sour cream, salsa, guacamole, etc.

Tuesday, June 19, 2012

Zucchini Pancakes

If you've got a garden (which I don't) and you find yourself over run with zucchini every summer (which sounds like a dream come true to me), here's a good option for you.  These are appropriately named pancakes, because texturally, that's just what they're like.  That being said, if you're looking for a crispy, fritter-type cake, this recipe is not for you.  I found these to be delicious and will probably be buying lots of zucchini from the farmers market to make them again.  Unless anyone local needs to unload a bunch of zucchini...

Zucchini Pancakes

from Ina Garten
2 medium zucchini (about 3/4 pound)
2 tablespoons grated red onion
2 extra-large eggs, lightly beaten
6 to 8 tablespoons all-purpose flour
1 teaspoon baking powder
1 teaspoon kosher salt
1/2 teaspoon freshly ground black pepper
Unsalted butter and vegetable oil


Preheat the oven to 300 degrees F. Grate the zucchini into a bowl using the large grating side of a box grater. Immediately stir in the onion and eggs. Stir in 6 tablespoons of the flour, the baking powder, salt, and pepper. (If the batter gets too thin from the liquid in the zucchini, add the remaining 2 tablespoons of flour.)
Heat a large (10 to 12-inch) saute pan over medium heat and melt 1/2 tablespoon butter and 1/2 tablespoon oil together in the pan. When the butter is hot but not smoking, lower the heat to medium-low and drop heaping soup spoons of batter into the pan. Cook the pancakes about 2 minutes on each side, until browned. Place the pancakes on a sheet pan and keep warm in the oven. Wipe out the pan with a dry paper towel, add more butter and oil to the pan, and continue to fry the pancakes until all the batter is used.
The pancakes can stay warm in the oven for up to 30 minutes. Serve hot.

Thursday, June 14, 2012

Creamy Pasta with Chard and Tomatoes

Over a birthday lunch at Whole Foods with my sister, I mentioned how frustrated I had been with cooking. I felt stuck in a rut of chicken nuggets and cheese pizzas and "kid food." I never made anything I really wanted anymore, or anything "just for me." As my wise older sister is wont to do, she enlightened me to the fact that I could very easily make myself something for lunch that was just for me, and cook a more kid-friendly dinner.
Light bulb.
This dish fits the bill perfectly, and it uses up the beautiful swiss chard I've discovered (and fallen in love with) at our farmer's market. I buy it every week, and this is my favorite way to eat it.
Creamy Pasta with Chard and Tomatoes
from Joy of Cooking

1 tbs olive oil
1/4 cup chopped onion
2 garlic cloves, minced
1/4 tsp red pepper flakes
2 large ripe tomatoes peeled and chopped or 1 cup chopped drained canned tomatoes
1 pound chard, trimmed and cut crosswise into 1/2 inch strips
3/4 cup heavy cream
salt and black pepper to taste
8 oz pasta (I used whole wheat penne)
3/4 cup grated parmesan (I used romano)

Cook pasta according to package directions, drain and set aside. Meanwhile, heat olive oil in a large pan over medium heat. Add onion, garlic, and red pepper flakes and cook, stirring occasionally, until soft and golden, about 2-3 minutes. Add tomatoes and cook, stirring occasionally, until most of the liquid is evaporated, about 5 minutes. Add the chard and cook until wilted, about 2 minutes. Add heavy cream, salt and pepper. Cook two minutes, until bubbling. Remove from heat, add to the pasta and toss well to coat. Toss in cheese and serve.

Tuesday, June 05, 2012

Homemade Chicken Stock

One of my favorite cooking tips ever came from Tyler Florence, who said that most chefs save up the onion peels, onion ends, carrot tips, etc., stash them in a bag in their freezer, and use them to make chicken stock.
I have a bag of veggie scraps in my freezer, and a bag of chicken bones. Once they start taking over my freezer, I dump them in my gigantic "pasta" pot with a built-in strainer. That pot is the other chicken stock game-changer. I bought it not long after we were married, because everyone on Food Network had one, but I hate cooking pasta in it. It's perfect for this.
So I have veggie scraps (they don't have to be scraps, obviously. You could just add a carrot or two, a couple of stalks of celery, an onion) and chicken bones (usually from about 3 roasted chickens). I add a bit of salt (probably 2 tablespoons or so, but it all depends on how big your pot is/how much stock you're making) and about 10 peppercorns (whole ones). I cover the whole thing with water, then slowly bring the temperature up. I used to just let it boil away for a few hours, but I've since learned that it should be just barely simmering.
*Alternatively, I've also made stock in the crock-pot before. Same method (cook on low), just cooked even longer.*
Just let it do that for a few hours, cool, strain, and stash in your freezer in ziploc bags or tupperware. Let it thaw overnight in the fridge. It's so great to have on hand at all times.
And do try to keep your children out of the scraps.

Tuesday, May 15, 2012

Baked Crispy Chicken Nuggets

Maybe, just maybe this will be my last chicken nugget recipe. First there were the buttermilk whole wheat nuggets. Then the lemony chicken nuggets. Now I give you my latest and greatest recipe yet. These are tasty, crispy, and require less baby-sitting than the other two. They're kind of a mash up of my other two recipes and they are my picky-eaters' favorite.
To keep the panko from falling onto the baking sheet and burning during the cook time, I dredge them on the wire rack set over the sink. Brilliant? Sometimes I am.
Also, although they say to never reuse your dredging materials, I almost always have some leftover, and I do save them. *Gasp!* I just label them, stick them in the freezer and ONLY use them for the same application next time.
Baked Crispy Chicken Nuggets

2-3 boneless, skinless chicken breasts, cut into bite sized nuggets
salt and pepper
1 cup buttermilk
1 cup panko breadcrumbs
about 1/4 tsp garlic powder
2-4 tbs olive oil

Preheat oven to 400.
Season nugget pieces with salt and pepper. Place in a large bowl and cover with buttermilk. You can do this a couple of hours ahead of time, if needed. On a plate, season the breadcrumbs with salt and pepper and garlic powder. Drain the buttermilk from chicken and coat with the breadcrumbs. Place breaded nuggets on a wire rack set over the sink (if possible). Drizzle with olive oil. Place wire rack onto a baking sheet. Bake nuggets 18-20 minutes, until cooked through and golden brown and crunchy.

Tuesday, January 10, 2012

Oatmeal Sandwich Bread

You can stop buying bread right now. No, really! This is it! THIS is the homemade bread recipe that can replace store-bought bread forever! It's not just a delicious bread you can enjoy with dinner. You can slice it and make a sandwich with it.

I'm not alone here, right? You've been wanting this, right?

Ok. Here it is.

(It's not my recipe at all, just something I pinned, so I thought I'd just share the link with you.)

Notes from my kitchen:
*The recipe calls for unsulphured molasses. More than likely, the molasses you find in your grocery store or Target will be unsulphured. Like this one or this one. I didn't have any so I used honey. Easy swap.

*I used white whole wheat flour. Still whole wheat, but so amazingly light and therefore easier to use in place of all-purpose flour in other recipes. I use this one.

*The bread flour I use is apparently higher in protein that other bread flours. I've been having issues with breads coming out too dry, so I used 1/4 cup more water than the recipe calls for.

*I used cheap, Target brand old-fashioned oats.

*As I do with most things I bake, I added about 2 tbs (maybe more) of ground flaxseeds.

Monday, December 19, 2011

Roasted Tomato Soup

Recipe #4 was Tyler Florence's Roasted Tomato Soup from his book Stirring the Pot. I'm a big fan of Tyler Florence. My husband can't stand him- thinks he's too full of himself. I think having kids has mellowed Tyler, for sure. I like his food a lot, and his cookbooks are gorgeous. The soup was delicious, alongside a grown up grilled cheese. I cut the boys' sandwiches into strips and they dipped them in the soup. Then I copied them. Delicious.
Roasted Tomato Soup
adapted from Tyler Florence

2 1/2 pounds fresh tomatoes (mix of fresh heirlooms, cherry, vine and plum tomatoes)
6 cloves garlic, peeled
2 small yellow onions, sliced
1/2 cup extra-virgin olive oil
Salt and freshly ground black pepper
1 quart chicken stock
2 bay leaves (I didn't have these)
4 tablespoons butter
1/2 cup chopped fresh basil leaves, optional (I didn't have these either, but used about 1/2 tsp of dried)
3/4 cup heavy cream, optional
Preheat oven to 450˚F.

Wash, core and cut the tomatoes into halves. Spread the tomatoes, garlic cloves and onions onto a baking tray. Drizzle with ½ cup of olive oil and season with salt and pepper. Roast for 20-30 minutes or until caramelized.
Remove roasted tomatoes, garlic and onion from the oven and transfer to a large stock pot. Pour in any liquid from the roasting pan, ¾ of the chicken stock, bay leaves and butter. Bring to a boil, reduce heat and simmer for 15-20 minutes or until liquid has reduced by1/3.
Wash and dry basil leaves and add to the pot. Puree the soup using an immersion stick blender until smooth. (Or use your blender, working in batches and being very careful not to let the lid pop off and hot soup burn you!) Return soup to low heat, add cream and adjust consistency with remaining chicken stock if necessary. Season to taste with salt and freshly ground black pepper.

Wednesday, October 05, 2011

NOT Hamburger Helper

It's something I'm proud of in the ugly, sinful sense, I admit. But I'm proud to say I've never eaten Hamburger Helper. I'm sorry if it offends you, but I'm anti-Helper, okay? Why do you need a box of preservatives to feed your family something that you can make with real ingredients, instead? Like this dish, which I like to call a happy accident. It's so kid-friendly, unless your kid is my oldest, who currently eats nothing and spat this out as if it were laced with arsenic.
NOT Hamburger Helper
adapted from Claire Robinson

1 lb ground beef
1 box penne pasta
1/2 cup whole milk
3/4 cup cream
4 oz grated cheddar
salt and pepper

In a large skillet over medium heat, cook the ground beef until no longer pink. Season with salt and pepper. Meanwhile, cook pasta according to package directions. Drain and return it to the pot. Add the milk, cream, and cheese and stir to melt the cheese completely. Season with salt and pepper. Add the meat to the pasta, check for seasonings.

Monday, September 26, 2011

Baked Tortilla Chips

It's inevitable- if it's taco night, there must be chips and salsa on the table, right? And do your kids end up eating mainly chips and salsa for dinner? Mine, too. So why not give them a healthier alternative in these baked tortilla chips? I often make tortilla strips to serve with taco soup and they're so incredibly easy, there's no reason I can't whip up a batch of chips on a regular basis.

Baked Tortilla Chips

corn tortillas
canola or olive oil
salt
seasoned salt, chili powder, whatever you want!

Preheat oven to 375. Cut corn tortillas in half, then cut the halves into thirds. Drizzle with canola oil and sprinkle with salt. Toss gently to coat each chip with oil and seasoning. Place on baking sheets and bake 8-12 minutes, until golden brown and crispy. Let cool slightly before devouring.

Monday, July 18, 2011

Pork Loin Pitas with Feta Sauce

I would never try to recreate the gyros from our favorite Greek dive. So I'm not even going to refer to these as gyros. What they are is a quick, delicious, hearty sandwich that everyone in my family enjoyed. They were perfect with garlic fries!
Pork Loin Pitas with Feta Sauce
feta sauce from Everyday Food

1 pork tenderloin (around 1 lb)
salt and pepper
dried oregano
4 pitas
2 oz feta cheese
juice of 1/2 lemon
1-2 tbs water
shredded lettuce

Trim pork tenderloin of any excess fat and cut into bite-sized pieces. Pat dry with paper towels. Season with salt, pepper, and oregano. Heat about 2 tbs olive oil in a large skillet over medium heat. Add the pork and cook, turning occasionally, until browned on every side and cooked through, about 10 minutes. (Even though I patted the pork dry, it still let off a lot of moisture, so I cranked the heat up to medium high until the water cooked off, then lowered it back to medium to let the meat brown and cook through.)
In a food processor, combine feta cheese, lemon juice, water (start with 1 tbs and add from there), and salt and pepper. Process until smooth.
Warm pitas in the microwave or wrap in foil and warm in the oven. Fill with pork, top with lettuce and feta sauce.